

Why the Right Concrete Crack Repair Material Makes or Breaks Your Floor Coating
Choosing the right concrete crack repair material is often the defining factor in whether a high-performance floor coating achieves its intended service life or experiences premature distress such as peeling, bubbling, or localized cracking. In the Denver metropolitan area and surrounding suburbs, where dramatic seasonal temperature swings and frequent freeze-thaw cycles subject concrete slabs to continuous thermal movement, this material selection becomes even more critical.
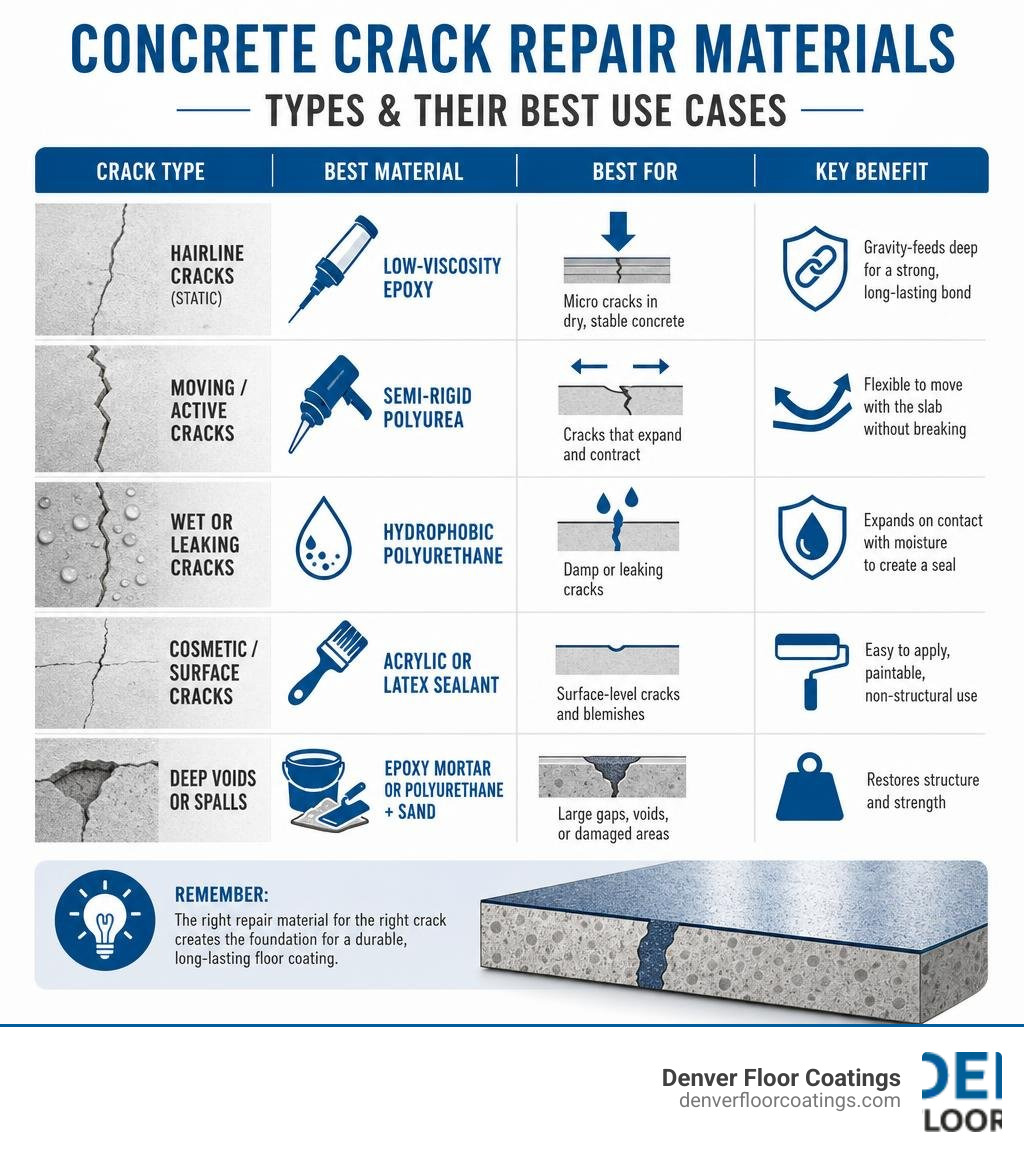
Quick Answer: Best Concrete Crack Repair Materials by Use Case
| Crack Type | Best Material | Why |
|---|---|---|
| Hairline cracks (static) | Low-viscosity epoxy | Gravity-feeds deep into micro-cracks; very high strength |
| Moving/active cracks | Semi-rigid polyurea | Flexible enough to move with the slab |
| Wet or leaking cracks | Hydrophobic polyurethane | Expands on contact with moisture to seal the crack |
| Cosmetic/surface cracks | Acrylic or latex sealant | Easy to apply; paintable; non-structural use only |
| Deep voids or spalls | Epoxy mortar or polyurethane + sand | Fills large gaps with structural strength |
Before applying any high-performance floor coating, it is important to recognize that the coating is only as stable as the concrete substrate beneath it. A crack left untreated—even a minor hairline fracture—can expand under Colorado’s rapid temperature fluctuations, which typically causes the overlying coating to split or delaminate. In professional floor preparation, applying a topcoat over compromised concrete is generally compared to painting over rust; without addressing the underlying structural issues, the aesthetic finish is highly likely to fail.
There are several repair chemistries available, including epoxy, polyurethane, polyurea, acrylic, and latex. Each is engineered for specific environmental conditions and structural demands. Utilizing an incompatible material is one of the primary reasons concrete repairs fail to hold over time.
At Denver Floor Coatings, we bring extensive engineering and operations experience, combined with years of hands-on work preparing and coating concrete floors across the Denver metro area. We understand how selecting the appropriate concrete crack repair material transforms a compromised slab into a stable, reliable foundation for a high-performance floor coating. In the sections below, we will explore how to identify the correct material for your specific project.
Main Types of Concrete Crack Repair Chemistry

Understanding the chemical composition of your repair material is a fundamental step in planning a durable restoration. Different compounds exhibit distinct behaviors during application, curing, and long-term exposure to environmental stressors.
For basic, non-structural cosmetic patches on horizontal surfaces, acrylic-based options like Sikacryl® Pourable Crack Repair Sealant offer a straightforward, pre-mixed option. These are generally suitable for minor surface blemishes on walkways or patios where structural load-bearing capacity is not a primary concern.
Similarly, elastomeric compounds such as Titebond TitePatch Elastomeric Patching Compound provide flexibility for non-structural cracks. However, because these water-based sealants are prone to shrinkage during the curing process and lack load-bearing strength, they are typically unsuitable as preparation materials under high-performance garage or commercial floor coatings.
Polyurethane and Polyurea Formulations
Urethane and polyurea formulations are highly effective for joint sealing and active crack management. Polyurethane formulations often utilize hydrophobic expansion, reacting with moisture inside the crack to foam, expand, and seal off active water leaks.
For professional floor preparation, modern two-part polyureas and ultra-low viscosity urethanes are favored for their rapid curing times and high elongation properties. These materials can cure within minutes, allowing professional installers to grind the repaired areas flush almost immediately. This inherent flexibility allows the material to stretch and compress with the natural thermal movement of the concrete slab.
Epoxy-Based Repair Systems
When the goal is to restore the structural integrity of a cracked concrete slab, epoxy is the industry standard. Epoxy repair systems act as a structural weld, chemically bonding the separated concrete segments back together.
Because epoxies possess high compressive strength and excellent adhesion properties, they can make the repaired joint stronger than the surrounding concrete. Products like Sikadur® Crack Fix utilize a low viscosity to gravity-feed deep into horizontal cracks, sealing them thoroughly from top to bottom.
Latex and Acrylic Sealants
Latex and acrylic sealants are designed primarily for superficial, cosmetic patching. They are highly flexible and easy to clean up, making them common for basic residential touch-ups.
While they offer compatibility with standard water-based paints, they are not designed to handle heavy vehicular traffic, nor can they withstand the chemical solvents found in industrial floor primers. Under a heavy epoxy or polyaspartic topcoat, these flexible sealants can outgas or compress, which often leads to bubbles and delamination of the final coating.
Key Performance Metrics of Concrete Crack Repair Material
When comparing different repair chemistries, analyzing the technical performance metrics on product data sheets helps ensure you select a material capable of handling the physical demands of your space.
| Performance Metric | Epoxy (e.g., Sikadur) | Polyurea / Polyurethane | Acrylic / Latex |
|---|---|---|---|
| Bond Strength | 3,000 – 3,800+ psi | 3,800 psi (up to 9,000 psi with sand) | Minimal (5.5 – 16 lbs adhesion) |
| Compressive Strength | 10,000 – 13,000 psi | 4,400 psi (mixed with sand) | N/A (non-structural) |
| Tensile Strength | 6,000 – 7,100 psi | 4,500 psi | Low |
| Viscosity | 105 – 500 cps (Low) | < 30 cps (Ultra-low) | 30,000 cps (Thick/Pourable) |
| UV Stability | Poor (prone to yellowing) | Moderate to Poor (requires topcoat) | Good |
Understanding Viscosity and Bond Strength
Viscosity, measured in centipoise (cps), dictates how easily a material flows. Water has a viscosity of approximately 1 cps, while thick syrup sits around 3,000 cps.
Super-low viscosity crack healers, such as Sikadur®-55 SLV (105 cps), can penetrate micro-cracks down to 2 mils wide. This deep penetration is essential to establish a strong mechanical bond within the concrete pores. Without high bond strength, the repair material is likely to peel away when subjected to shear forces. High-performance epoxies like Ardex RA144 leverage a 500 cps viscosity to balance easy gravity-feeding with structural bond strength.
Compressive and Tensile Strength Requirements
For heavy-duty environments, the material must withstand both downward crushing forces (compressive strength) and pulling forces (tensile strength). Standard residential concrete typically has a compressive strength of 3,000 to 4,000 psi.
Structural epoxies easily exceed this, often reaching compressive strengths of over 10,000 psi. This high load-bearing capacity helps prevent the edges of repaired cracks from spalling or collapsing under heavy vehicle tires or industrial forklift traffic, ensuring a more durable foundation for subsequent coatings.
Structural vs. Cosmetic Concrete Crack Repairs

Before choosing your material, it is necessary to determine whether your goal is to restore the structural strength of the slab or simply seal it to prevent water and gas intrusion.
Restoring Load-Bearing Capacity
Structural repairs are required when a crack threatens the integrity of the concrete foundation or floor. This is common in load-bearing slabs that have suffered settling over time.
By utilizing low-pressure port injection with a specialized Sikadur® Crack Repair Kit, high-strength epoxy can be pumped deep into vertical or horizontal cracks. Once cured, this process helps weld the concrete back into a continuous, load-distributing structure, mitigating the risk of further movement.
Cosmetic Sealing and Moisture Barriers
Non-structural or cosmetic repairs focus primarily on sealing the surface. The goal here is to block water intrusion, prevent radon gas from seeping up through the soil, and minimize moisture vapor transmission.
Even if a crack is cosmetic, sealing it properly is a critical phase of learning How to Restore Your Concrete Floor. Uncontrolled moisture vapor rising through unsealed cracks can build hydrostatic pressure, which often causes subsequent floor coatings to blister, bubble, and eventually fail.
How to Choose the Right Repair Solution for Your Slab
Selecting the ideal concrete crack repair material requires evaluating the physical characteristics of the crack and the environment surrounding your slab. If you are preparing a floor for a long-lasting finish, taking the time to diagnose the crack is a vital step in The Concrete Comeback: A Step-by-Step Guide to Fixing Dull, Worn Floors.
Selecting the Right Concrete Crack Repair Material for Your Project
The most critical question is whether the crack is active (moving) or static (dormant).
- Static Cracks: Caused by one-time events like initial drying shrinkage or historical settling. These can be permanently welded using a rigid epoxy.
- Active Cracks: Subject to ongoing thermal expansion and contraction or structural movement. If you fill an active crack with a rigid epoxy, the concrete will typically crack again right next to the repair. Active cracks and expansion joints require a semi-rigid polyurea or flexible polyurethane sealant that can stretch without tearing. For highly complex slabs with extensive cracking, it is often best to have the concrete prepped and Resurface Concrete by a Professional.
Addressing Environmental and Location Factors
Location dictates application constraints. Vertical basement walls require non-sag gel epoxies or port-injection polyurethane foams that won’t run out of the crack before curing. Horizontal floors, on the other hand, benefit from self-leveling, pourable materials.
Additionally, if the crack is actively leaking or damp, you must use a moisture-tolerant, hydrophobic polyurethane that uses the water to trigger its curing process. Finally, outdoor slabs exposed to Colorado’s intense high-altitude sunlight require UV-resistant sealants, as standard epoxies will rapidly yellow and degrade under UV exposure.
Step-by-Step Preparation and Application Methods
No matter how advanced your repair chemistry is, it is highly likely to fail if the concrete is not prepped correctly. Dust, oil, and loose debris act as bond breakers, preventing the repair material from adhering to the concrete pores. Properly preparing the substrate is just as critical as selecting the right primer when navigating Concrete Sealer 101: What It Does and Key Benefits.
Preparing the Substrate for Optimal Adhesion
- Crack Chasing (V-Grooving): Use an angle grinder equipped with a V-groove diamond blade to open up the crack. This creates a wider channel, exposing clean, sound concrete and giving the repair material more surface area to bond with.
- Mechanical Cleaning: Wire brush the inside of the chased crack to loosen any remaining dust or micro-fractured concrete.
- Dust Extraction: Vacuum the crack thoroughly using an industrial HEPA-filtered vacuum to meet OSHA silica dust control standards. Do not use compressed air unless it is completely oil-free, as standard compressors can spit trace amounts of oil onto the clean concrete, ruining adhesion.
- Moisture Testing: Verify that the concrete’s moisture levels are within the limits of your repair material using a calcium chloride or relative humidity test.
Application Techniques for Hairline Cracks vs. Large Voids
For hairline cracks, a simple gravity-feed method using low-viscosity epoxy or polyurea is highly effective. The material is poured directly over the crack and allowed to sink deep into the void.
For larger cracks, deep voids, or spalls, the Sand Pre-Fill Method is an excellent way to add bulk and structural strength. Fill the clean crack with dry, kiln-dried silica sand first, then pour a super-low viscosity polymer over the sand. The liquid saturates the sand, creating a high-strength mortar that cures rapidly and exhibits minimal shrinkage.
How to Calculate the Volume of Concrete Crack Repair Material Needed
To avoid running out of material mid-project, calculate the volume of the crack using this basic formula:
$$\text{Volume (cubic inches)} = \text{Length (inches)} \times \text{Width (inches)} \times \text{Depth (inches)}$$
For deep cracks (greater than 3/8 inch), always insert a closed-cell backer rod into the bottom of the crack first. This prevents three-sided adhesion (which causes flexible sealants to tear when the joint moves) and saves a significant amount of expensive repair material.
Frequently Asked Questions About Concrete Crack Repair
Can concrete crack repair material be applied to wet or damp surfaces?
It depends entirely on the chemistry. Moisture-tolerant epoxies and hydrophobic polyurethanes can be applied to damp concrete, provided there is no standing water. However, standard acrylics, latex compounds, and typical epoxies require a completely dry substrate. Applying them to wet concrete drastically reduces their adhesion strength.
How long does concrete crack repair material take to cure before traffic?
Cure times vary from minutes to days. Fast-setting polyureas can have a pot life of just 1 to 3 minutes, becoming walkable in 15 to 20 minutes and ready for heavy traffic in less than an hour. Conversely, traditional structural epoxies may require 6 to 12 hours to become tack-free and up to 7 days to achieve their full compressive strength.
Why do repaired concrete cracks sometimes fail or reappear?
The two primary causes of failure are poor surface preparation (leaving dust or moisture inside the crack) and using a rigid repair material on an active, moving joint. When a temperature swing forces the slab to move, a rigid filler will cause the concrete to stress-crack along the edge of the repair.
Conclusion
Choosing the correct concrete crack repair material and executing meticulous substrate preparation are the absolute foundations of a beautiful, long-lasting floor. Skipping these steps or using cheap, incompatible fillers will inevitably lead to peeling, cracking, and a failed installation.
At Denver Floor Coatings, we specialize in transforming worn, cracked concrete into stunning, showroom-quality spaces. Our team handles the entire process — from industrial diamond grinding and professional crack repairs to the application of UV-stable, chemical-resistant polyaspartic and epoxy flake finishes. Whether you are dealing with minor garage floor wear or preparing a high-traffic commercial facility, we ensure the substrate is structurally sound and perfectly prepped.
To learn more about how we address concrete prep, check out our guide on Epoxy Floor Repair: Minor Damage.
Ready to upgrade your concrete with a professional, worry-free finish? Contact Denver Floor Coatings today to request a free estimate!