

How to Fix Epoxy Garage Floor Peeling Before It Spreads
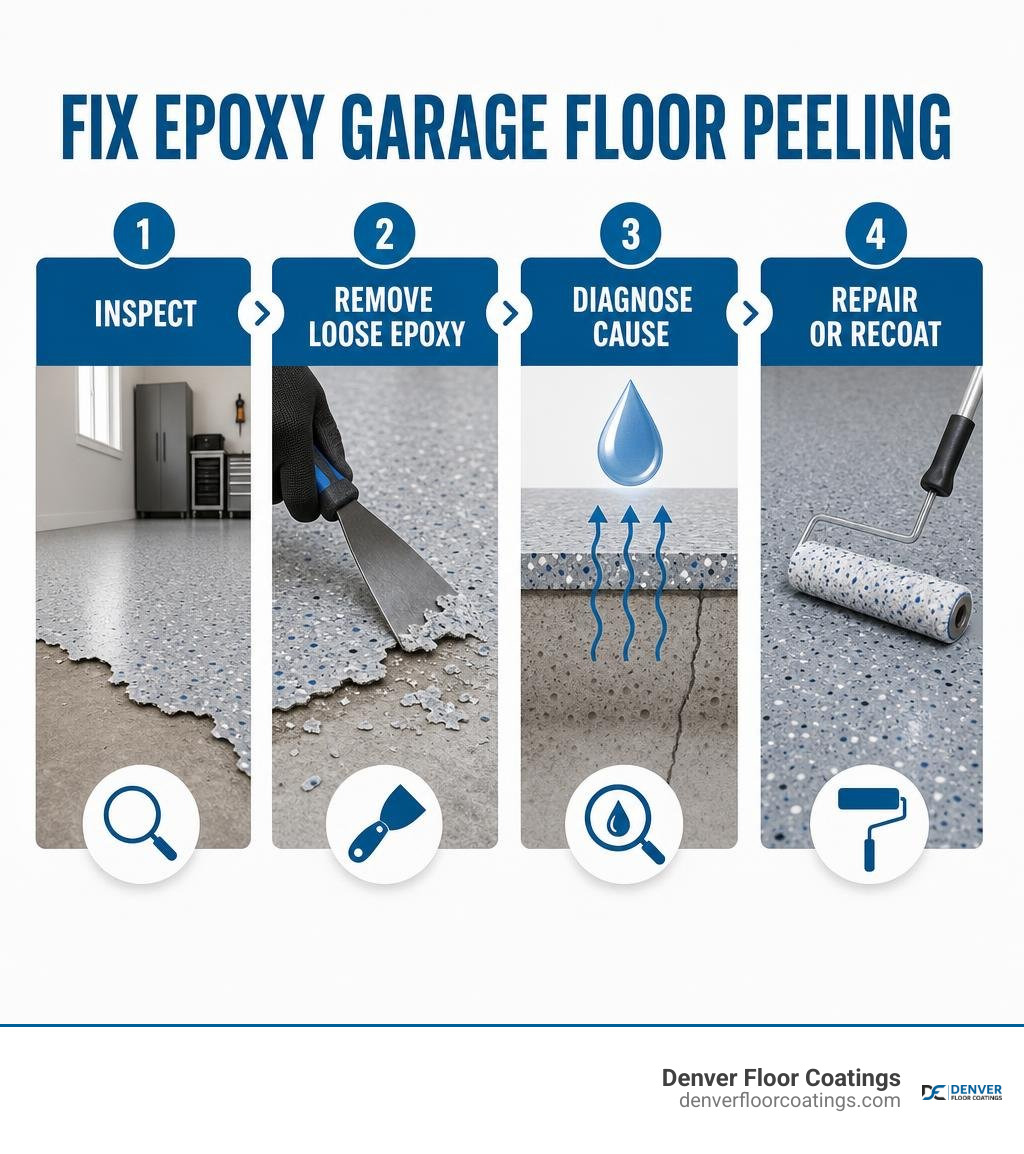
To address epoxy garage floor peeling, it is essential to first isolate and remove every loose, bubbling, or hollow-sounding section of coating before taking any further action. Simply reapplying a top layer over failing resin will almost always result in repeat delamination. Identifying the true underlying cause—whether related to mechanical bond failure, trapped vapor transmission, thermal stress, or chemical contamination—is critical to creating a durable, long-lasting surface.
Small, localized areas may occasionally be addressed with targeted spot repairs once the concrete is properly diamond-ground, cleaned, and feathered at the transitions. However, widespread peeling, pervasive blistering, or repeated lifting under vehicle tire tracks often indicates a systemic issue across the concrete substrate, necessitating total coating removal and a comprehensive resurfacing process.
The most frequent contributors to coating delamination include insufficient surface preparation, continuous moisture movement through the concrete slab, hot-tire pickup, incorrect chemical mixing ratios, and application outside appropriate environmental temperature and humidity thresholds. A new coating system cannot perform as engineered if it is rolled over compromised material or an unresolved substrate issue.
Peeling often starts around garage-door perimeters where exterior elements introduce moisture, directly beneath vehicle parking spots, or in expansive sheets across open floor space. This guide explores the mechanical and chemical factors that cause coating detachment, outlines how to evaluate whether a localized repair or a full system replacement is appropriate, and details the rigorous installation practices needed to maintain a resilient floor.
Denver Floor Coatings specializes in high-performance epoxy and polyaspartic coating systems, including decorative flake finishes, rather than stained concrete services. Concrete floor repair is a small component of our floor-coating preparation work, but proper substrate repairs, moisture testing, and surface profiling make an essential difference in preventing epoxy garage floor peeling.
I am Mike Wislinsky, Founder and President of Denver Floor Coatings, with more than 20 years of engineering and operations management experience. I apply that process-focused, analytical approach to resolving epoxy garage floor peeling, helping homeowners identify the fundamental mechanics behind floor failure rather than merely masking surface symptoms.
Helpful guides related to garage floor systems and maintenance:
- Explore options for the best floor coating for concrete to understand multi-layer systems.
- Learn more about selecting durable coatings for garage floor installations.
- Discover how to maintain a seamless, cleanable garage epoxy finish for everyday use.
Why Is Your Epoxy Garage Floor Peeling? Key Causes and Diagnosis

Understanding why a resin system separates from concrete requires examining the microscopic interface between the polymer film and the concrete substrate. When delamination occurs, it signals a breakdown in mechanical anchoring, unmanaged hydrostatic forces, thermal contraction stresses, or chemical interference during curing.
Inadequate Surface Profile and Chemical Etching Inconsistencies
One of the most frequent reasons for coating failure is improper surface preparation. Smooth, power-troweled garage slabs possess a dense, non-porous surface layer covered with laitance—a fragile, powdery slurry of fine cement particles and free lime that rises during finishing. If a resin coating is placed directly over this unprofiled layer, it bonds only to the weak laitance rather than the structural aggregate below.
For a coating to develop adequate mechanical tensile and shear adhesion, the surface must be opened to achieve an International Concrete Repair Institute (ICRI) Concrete Surface Profile (CSP) of 2 to 3. While mild chemical washes or acid solutions are sometimes used in general construction, they often fail to etch dense, machine-troweled slabs evenly and cannot effectively break down deep hydrocarbon or motor oil deposits. Furthermore, residual acid trapped within concrete pores can disrupt the alkaline balance required for proper resin curing. A professional epoxy floor installation process relies on heavy planetary diamond grinding to abrade the surface uniformly, remove laitance, open the concrete capillary network, and expose solid aggregate for deep resin penetration.
Moisture Vapor Transmission and Hydrostatic Pressure
Concrete slabs are naturally porous and continually exchange moisture with the ground beneath them. When groundwater vapor migrates upward through the porous capillary structure of the slab, it reaches the impermeable underside of an epoxy film. This process is known as Moisture Vapor Transmission (MVT).
As moisture vapor accumulates beneath the non-breathable resin layer, pressure builds. Over time, high hydrostatic pressure and the accumulation of alkaline moisture salts can break the chemical bond between the polymer and concrete, causing osmotic blistering, bubble formation, and widespread sheet delamination. Standard residential epoxy formulations are typically rated for modest vapor levels, often around 3 lbs per 1,000 sq ft per 24 hours (or approximately 75% internal relative humidity). Performing comprehensive concrete moisture testing in accordance with standard ASTM F1869 calcium chloride tests or ASTM F2170 in-situ relative humidity probes is essential to determine whether specialized vapor-mitigating basecoats are needed. Understanding how to get rid of concrete moisture complications through specialized moisture-blocking epoxy primers protects the subsequent layers against pressure-induced bond failure.
Hot Tire Pickup and Plasticizer Migration
When coating delamination occurs exclusively in the rectangular footprints where vehicle tires rest, the root issue is hot tire pickup combined with plasticizer migration. As vehicles are driven at highway speeds, friction generates significant heat within the tire rubber. When the vehicle is parked on the garage floor, the heat transfers directly into the floor coating.
As the tires cool, the rubber contracts slightly, creating substantial tensile pull on the resin beneath it. At the same time, plasticizers—the synthetic chemical agents added to tire compounds to keep rubber flexible—leach directly out of the hot tire and migrate into the coating matrix. Thin, solvent-based coatings or under-cured resins are particularly vulnerable to this chemical softening, which weakens their cross-link structure and causes the coating to pull away in rectangular tire tracks. Reviewing recommendations on when can you finally park your car on your new epoxy floor ensures the resin matrix reaches adequate cure density and hardness before supporting heavy, heated vehicle loads.
UV Degradation, Off-Ratio Mixing, and Environmental Incompatibilities
Standard bisphenol-A epoxy resins are aromatic polymers, meaning their chemical backbone contains benzene rings that naturally break down when exposed to ultraviolet (UV) radiation. In garage spaces that receive natural sunlight near overhead doors or windows, unshielded epoxy layers can yellow, become micro-fractured, turn brittle, and eventually flake away.
Application conditions also introduce variables that compromise coating integrity:
- Inaccurate Mix Ratios: Epoxy relies on an exact stoichiometric reaction between the resin base (Part A) and the amine hardener (Part B). Deviation from the specified mix ratio leaves unreacted chemical groups, resulting in a soft, tacky cure that cannot resist shear forces.
- Amine Blush: Applying resin under high relative humidity or when the slab temperature is near the dew point causes the curing amine compounds to react with atmospheric carbon dioxide and moisture. This creates a waxy, carbamate surface film known as amine blush that prevents topcoats from adhering.
- Substrate Contamination: Unaddressed engine fluids, brake fluids, and curing compounds act as bond breakers, preventing liquid resins from wetting out the concrete aggregate.
Budget-Friendly Strategies: Spot Repair vs. Full Recoat
When evaluating a damaged floor, choosing between a targeted repair and a full floor restoration depends on the underlying mechanism of failure, the percentage of affected surface, and long-term durability expectations.
| Feature | Professional Spot Repair | Full Removal & Multi-Layer System |
|---|---|---|
| Recommended Scope | Under 10% of floor; isolated damage | Greater than 20% of floor; widespread failure |
| Primary Causes Addressed | Localized physical impact, superficial gouges | Moisture transmission, systemic prep failure, hot-tire lifting |
| Longevity Profile | Suitable for targeted aesthetic patching | Designed for extended service life under typical garage wear |
| Visual Uniformity | Patch perimeter may remain faintly visible | Seamless, consistent, multi-layered decorative finish |
| Substrate Preparation | Localized diamond grinding and feathering | Comprehensive mechanical diamond grinding across entire slab |
For a clear perspective on investment planning, review our garage floor coatings cost guide to evaluate when localized patching represents practical value versus when full mechanical resurfacing is required.
Professional Spot Repair Process for Localized Peeling
When coating separation is confined to a small, isolated section and moisture testing confirms that systemic vapor pressure is not present, a targeted repair can restore surface protection without requiring full floor stripping.
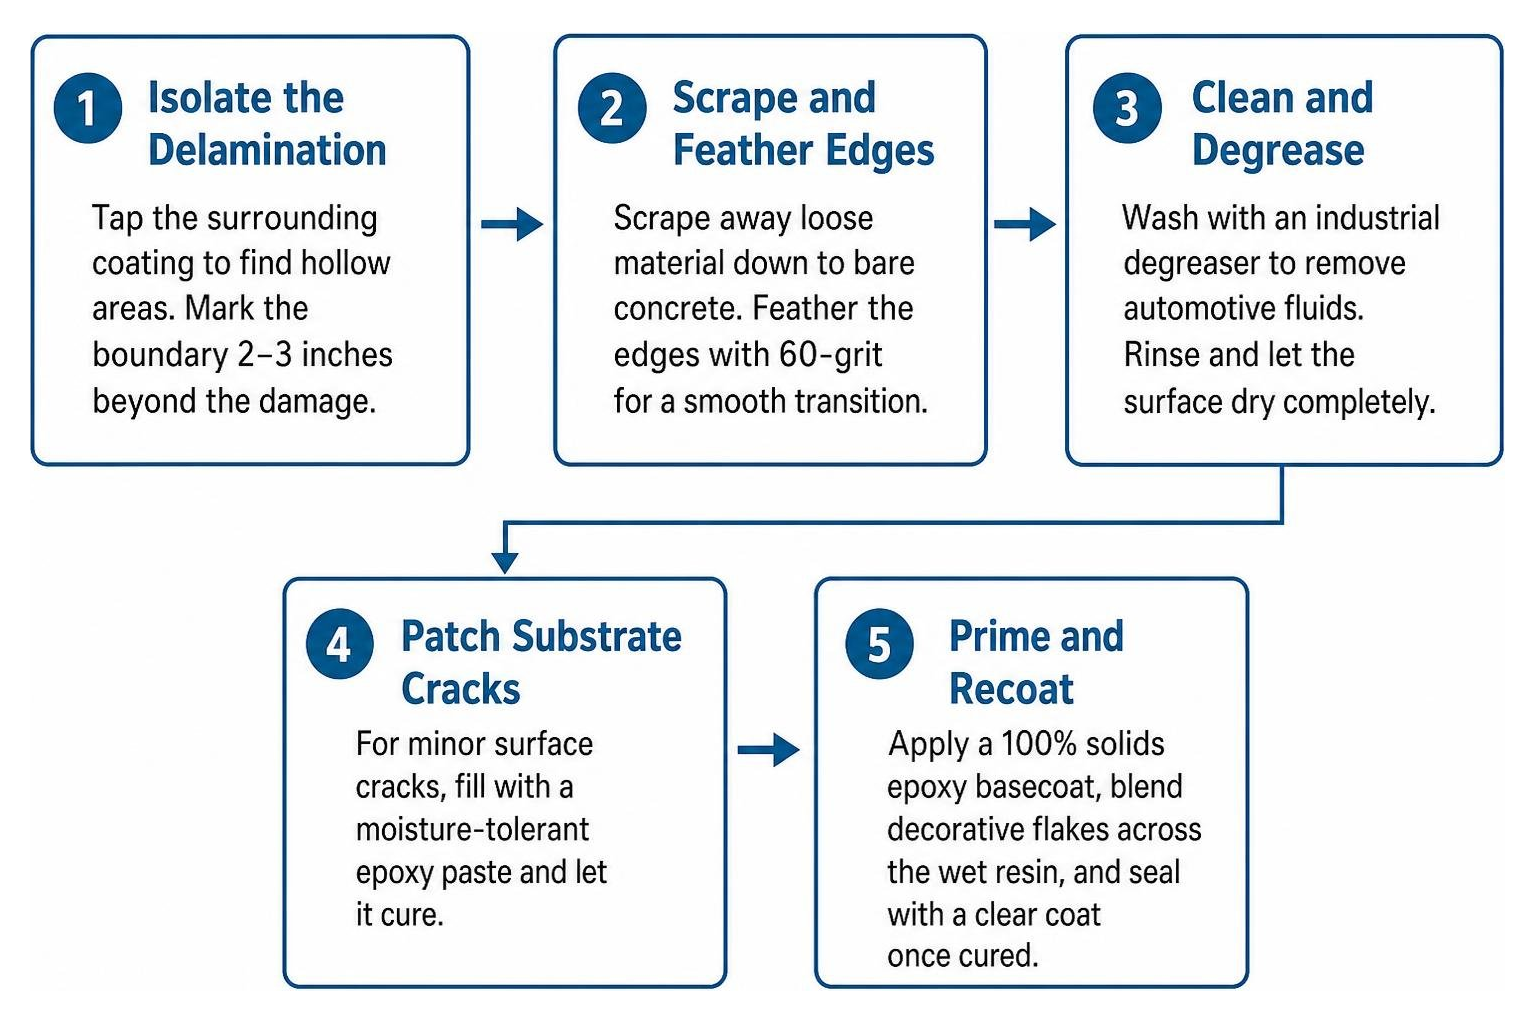
- Acoustic Sounding and Boundary Mapping: Technicians tap the concrete around the peeling area with a sounding rod to identify hidden hollow spots or micro-delamination, establishing repair boundaries well beyond the visible peel.
- Coating Removal and Edge Feathering: All loose material is removed down to solid concrete. Technicians use hand-held diamond grinding tools to feather the hard perimeter of the intact coating to a fine, tapered bevel, preventing abrupt ridges.
- Decontamination and Mechanical Profiling: The exposed concrete is mechanically profiled to open the pores, followed by intensive cleaning with industrial degreasers to extract any deep oil residue.
- Crack and Spall Repair: Where minor fissures exist, our crew utilizes technical guidelines on how to repair concrete without hassle using rigid, high-modulus epoxy repair polymers.
- Basecoat, Flake Blending, and Protective Sealing: A 100% solids epoxy primer is worked into the prepared concrete pores, decorative vinyl flakes are custom-blended to match the existing pattern, and a durable clear protective layer is applied over the patch.
When Full Removal and Recoating Is the Only Real Solution
When delamination affects more than 20% of the garage floor, or if blistering is evident across multiple slabs, spot repairs generally offer only temporary aesthetic relief. Applying new material over an unstable substrate will not prevent adjacent sections from lifting over time.
A long-term solution requires mechanically stripping the failed coating down to raw aggregate across the entire floor. During this process, technicians repair underlying slab defects and expansion joints using proven methods like stop the split: a step-by-step garage floor crack repair to restore concrete structural stability before installing an advanced, multi-layer coating system.
Preventing Future Coating Delamination with Advanced Systems

Preventing recurring coating failures requires selecting materials engineered to withstand intense thermal shifts, vehicle weight, chemical exposure, and moisture variations. Modern floor coating systems combine deeply penetrating basecoats with resilient topcoats to provide dependable performance. Reviewing the best garage coating configurations helps illustrate how multi-layer builds resist daily stresses.
High-solids formulations cure into dense, non-porous surfaces that resist automotive fluids, deicing salts, and abrasive grit. Installing high-performance materials creates a resilient, stain proof garage flooring surface that shields the underlying concrete from environmental deterioration.
The Polyaspartic and Urethane Advantage
While a 100% solids epoxy basecoat excels at wetting out mechanically ground concrete to form high-strength structural bonds, modern protective topcoats benefit significantly from aliphatic polyaspartic and polyurethane chemistries.
Polyaspartic topcoats offer distinct physical advantages:
- Rapid Cross-Linking and Controlled Cure: Polyaspartics cure efficiently, allowing faster return-to-service times while maintaining optimal cross-link density.
- Resistance to Hot Tire Lifting: The tight molecular matrix resists plasticizer softening and withstands the shear stresses exerted by hot vehicle tires.
- Ultraviolet Light Stability: Aliphatic polyaspartic formulations do not discolour, chalk, or embrittle when exposed to sunlight entering through open garage doors.
- Chemical Resistance and Ease of Cleaning: The non-porous clear layer resists engine oil, transmission fluid, and chemical solvents, helping you maintain cleanable garage floor coatings with routine maintenance.
Where slab moisture levels exceed standard thresholds, moisture-mitigating epoxy primers or urethane slurry systems can be specified to manage elevated vapor pressure, providing a secure foundation for subsequent coating layers.
Frequently Asked Questions About Epoxy Floor Failures
Can you apply a new coat of epoxy directly over an existing peeling floor?
No. A new coating layer can only bond as securely as the material beneath it. Applying fresh resin over an unprofiled, failing coating traps moisture, fails to establish a mechanical anchor to the concrete, and typically leads to rapid delamination of both layers.
How long can a professionally installed garage floor coating system last?
While actual service life depends on daily vehicle traffic, environmental conditions, maintenance practices, and slab stability, a professionally installed multi-layer flake system on diamond-ground concrete is designed to provide years of dependable service when properly maintained.
What moisture levels indicate that standard epoxy may fail?
Standard epoxy coatings are generally susceptible to adhesion loss when moisture vapor emission exceeds 3 lbs per 1,000 sq ft per 24 hours (or relative humidity readings above 75%). When testing indicates elevated moisture transmission, specialized moisture-mitigating primers are required to safeguard bond strength.
Why does peeling occur primarily where vehicle tires rest?
Hot vehicle tires transfer thermal energy into the coating while leaching plasticizers into the resin matrix. This combination softens lower-grade coatings and generates tensile stress as the tire cools and contracts, causing the material to pull away from poorly prepared concrete.
Conclusion
Addressing epoxy garage floor peeling requires identifying whether the failure stems from improper surface profiling, unmitigated moisture vapor, thermal stress, or product incompatibility. While minor surface damage may occasionally be resolved through careful spot repair, systemic peeling across the slab is best resolved with thorough diamond grinding and an advanced multi-layer coating system.
Denver Floor Coatings specializes in high-performance epoxy and polyaspartic coating systems, including decorative flake finishes, rather than stained concrete services. Concrete floor repair is a small component of our floor-coating preparation work, ensuring that cracks, spalls, and moisture challenges are properly managed before applying premium materials.
If you are looking to restore your garage surface with epoxy garage floor coatings durable stylish solutions, our experienced team is here to assist. We encourage you to contact us today to schedule a comprehensive on-site assessment and receive a detailed estimate for your garage floor transformation.